TikTok, with its vast user base and engaging content, has become a powerhouse platform for brands and creators alike. However, maintaining a consistent presence can be challenging amidst busy schedules and fluctuating engagement times. That’s where scheduling TikTok posts comes into play. In this guide, we’ll walk you through the process of scheduling TikTok posts using both the native feature and a third-party tool like SocialPilot, highlighting the benefits along the way.
Benefits of Scheduling TikTok Posts:
- Consistency: Maintain a steady stream of content without having to manually post every time.
- Time Efficiency: Batch-create and schedule posts during downtime, freeing up time for other tasks.
- Reach Optimization: Post at optimal times for your audience, even if it’s outside of your usual availability.
- Global Reach: Schedule posts to accommodate different time zones and reach audiences worldwide.
- Strategic Planning: Plan and organize content in advance, ensuring a cohesive and well-thought-out feed.
Scheduling TikTok Posts Using TikTok’s Native Feature:
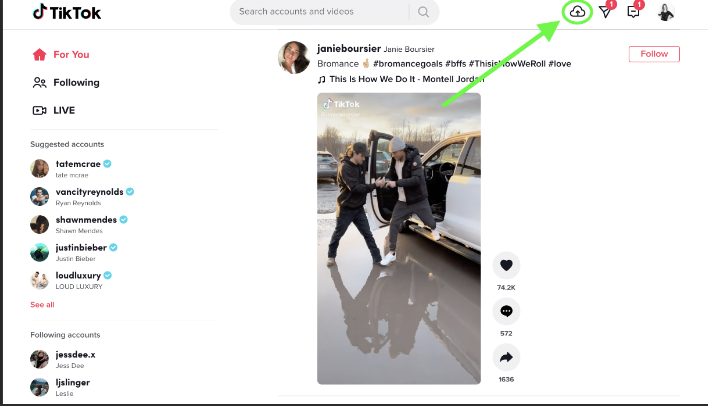
Step 1: Open Your Account on Desktop:
Start by accessing your TikTok account on a desktop browser. While TikTok primarily operates on mobile devices, scheduling posts is currently only available through the desktop version.
Step 2: Changing Your Account Type:
Users must first navigate to their TikTok profile settings, typically accessible by clicking on their profile icon or username. Within the settings menu, there should be an option to manage account settings or account type. Users then select the option to switch to a “business” account, which may require providing additional information or agreeing to specific terms and conditions. Once the account type is successfully updated, users gain access to a range of advanced features, including analytics tools, promotional options, and most importantly, the ability to schedule posts.
Step 3: Record or Upload Your Post:
After ensuring that your account is switched to a “business” account, you’re ready to create or select the content you wish to schedule. If you’re recording a video directly on TikTok, simply tap the “+” button to start recording. If you have pre-recorded content that you’d like to schedule, you can upload it by tapping on the “Upload” button instead. This allows you to select a video from your device’s gallery or camera roll.
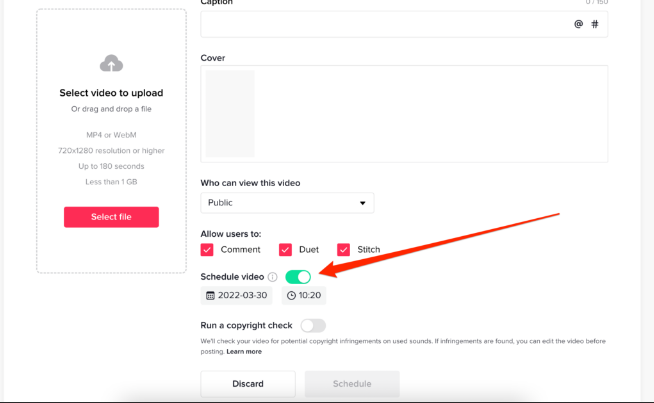
Step 4: Schedule Your Post:
After finalizing your video and adding any necessary effects, captions, and hashtags, navigate to the posting screen. Here, instead of tapping the “Post” button immediately, look for the “Schedule” option. Upon selecting this option, you’ll be prompted to choose the date and time you want your post to be published. Once you’ve selected your desired scheduling parameters, confirm your choices, and your post will be scheduled accordingly.
Scheduling TikTok Post Using SocialPilot Within Minutes:
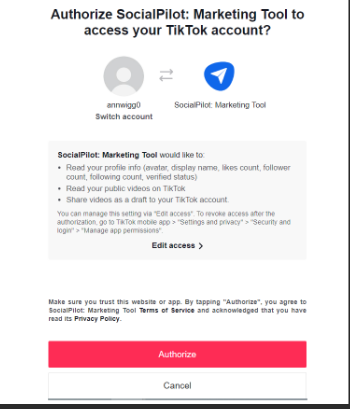
Step 1: Connect Your TikTok Profile to Your SocialPilot Account:
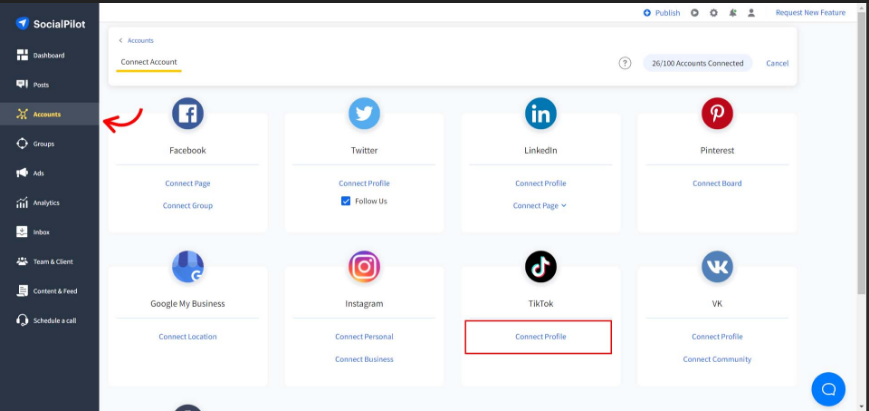
Log in to your SocialPilot dashboard using your credentials. Once logged in, navigate to the “Accounts” section, where you’ll find options to connect various social media accounts, including TikTok. Click on the TikTok option, and you’ll be prompted to authorize SocialPilot to access your TikTok account. Follow the provided instructions to grant the necessary permissions. After authorization, SocialPilot will be able to manage your TikTok posts on your behalf.
Step 2: Click the “Create Post” and Select TikTok Platform:
After successfully connecting your TikTok profile to your SocialPilot account, navigate to the dashboard and locate the “Create Post” button or option. Click on this button to begin creating a new post. Within the post creation interface, you’ll be prompted to select the platform for which you want to schedule the post. Since you’re scheduling a TikTok post, choose TikTok from the available options. Once TikTok is selected, you can proceed to upload your video content and add any captions, hashtags, or other elements to optimize your TikTok post for engagement.
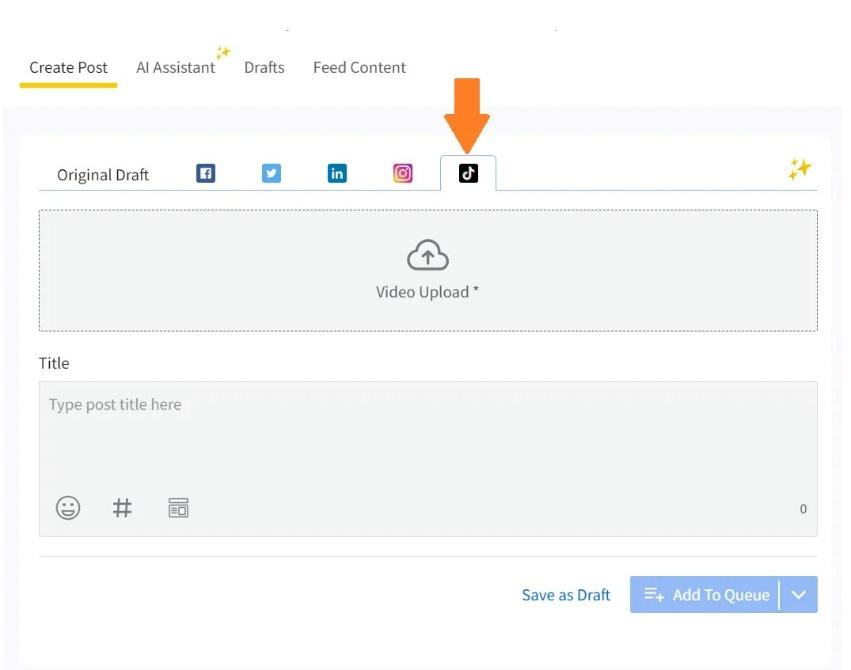
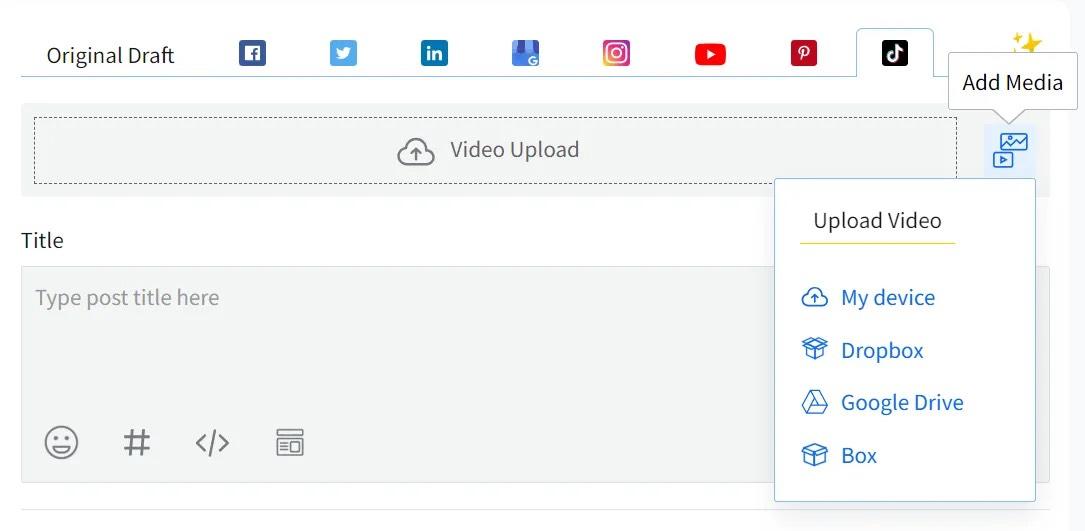
Step 3: Upload the Video to Schedule:
After selecting TikTok as the platform for scheduling within the SocialPilot dashboard and proceeding with the post creation process, you’ll be prompted to upload your video content. To do this, click on the designated area within the post creation interface to either select a video file from your device or upload it directly from your computer.
Ensure that the video you’re uploading meets TikTok’s specifications in terms of format, size, and length. Once the video is uploaded, you can preview it within the post creation interface to ensure that it appears as desired.
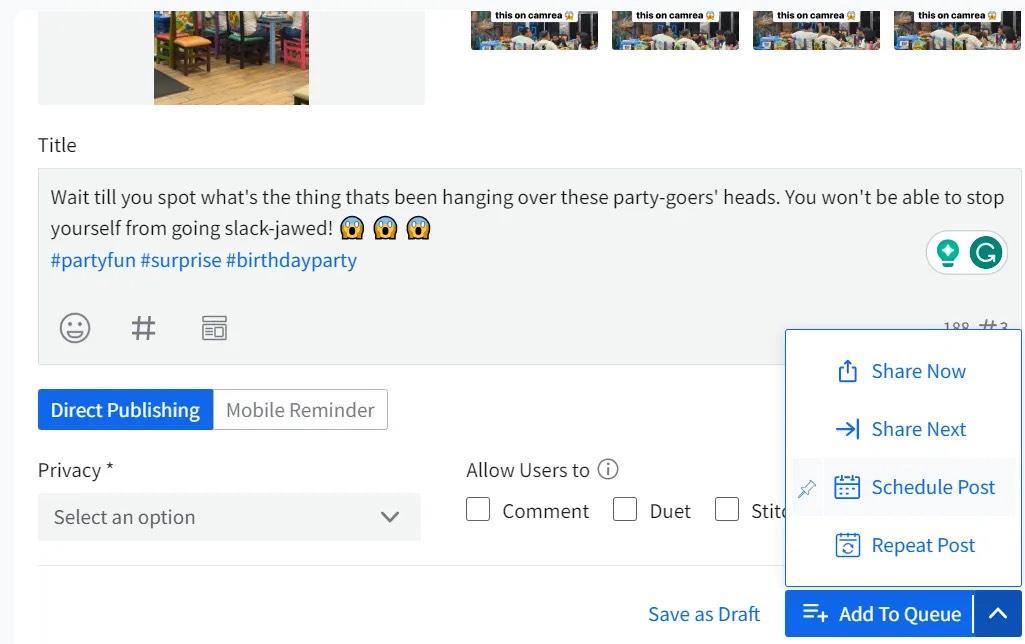
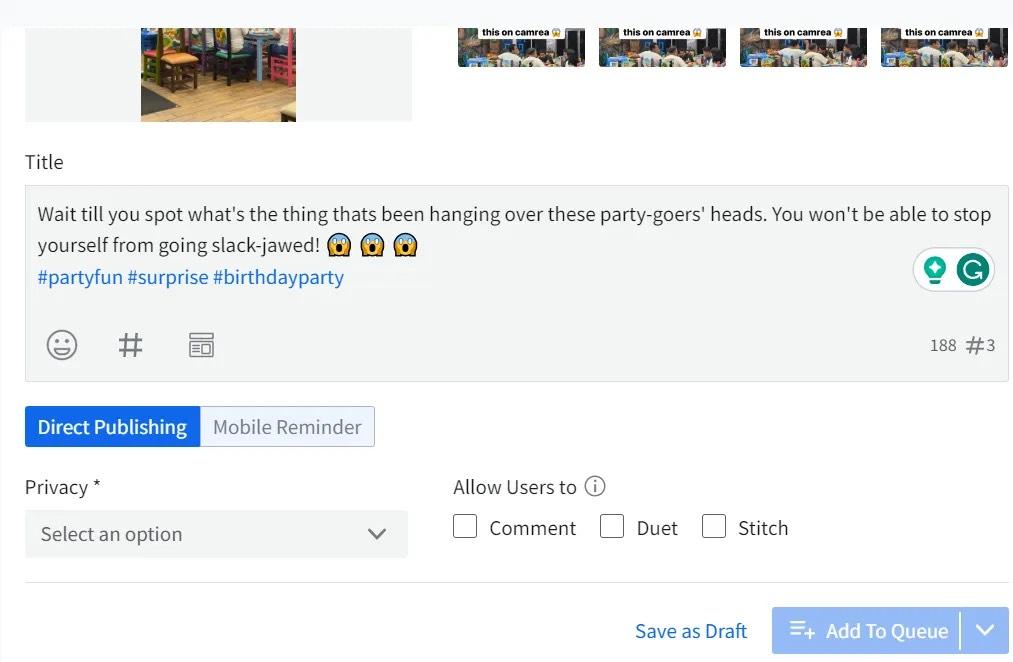
Step 4: Prepare the TikTok Scheduled Post:
After uploading your video content within the SocialPilot dashboard and finalizing its placement within the scheduled post, you’ll have the option to input accompanying text, captions, and hashtags. use captions effectively to provide context, convey your message, or prompt viewers to take action, such as liking, commenting, or sharing the post. SocialPilot may also offer features or tools to assist with caption formatting, hashtag suggestions, or other aspects of post optimization for TikTok.
Step 5: Schedule Your Post on TikTok:
After you’ve uploaded your video content, added captions, hashtags, and any other necessary elements within the SocialPilot dashboard, it’s time to schedule the post for publication. Proceed to the scheduling options provided by SocialPilot, where you’ll be prompted to select the desired date and time for the post to go live on TikTok. Once you’ve chosen the appropriate scheduling parameters, confirm your selections, and SocialPilot will automatically publish the post to your TikTok account at the specified time.